Adding User Principal Name to Service Account
This section will guide you on how to add User Principal Name (UPN) to Service Account. You will need to follow the direction here if your AD FS is configured to run using a Service Account. You can check whether AD FS is using Service Account by using the Services Tool (open Start Menu and type services). If Log On As for Active Directory Federation
Services ends with '$' (dollar sign), this indicates that your AD FS is running using a Service Account.
 |
UPN is required to identify the end entity of the issued certificate, but since Service Account does not have UPN by default, it is required that this information is filled out before issuing Enrollment Agent certificate to the Service Account.
To add UPN to Service Account:
Open Active Directory Users and Computers from Windows Administrative Tools.
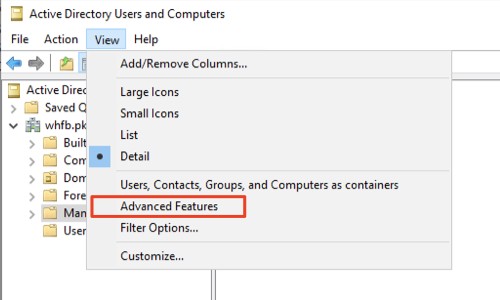
Click View and enable Advanced Features by selecting the option. This will enable editing the attribute of the Service Account.

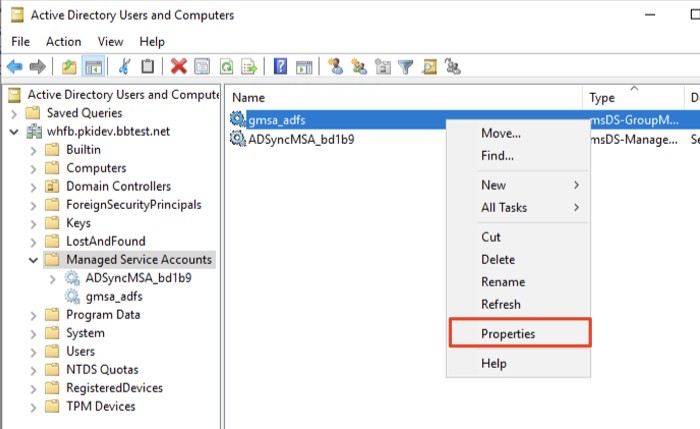
In the tree window at the left, collapse the domain in which the Service Account exists, and select Managed Service Accounts. Right-click the Service Account configured for AD FS and select Properties.

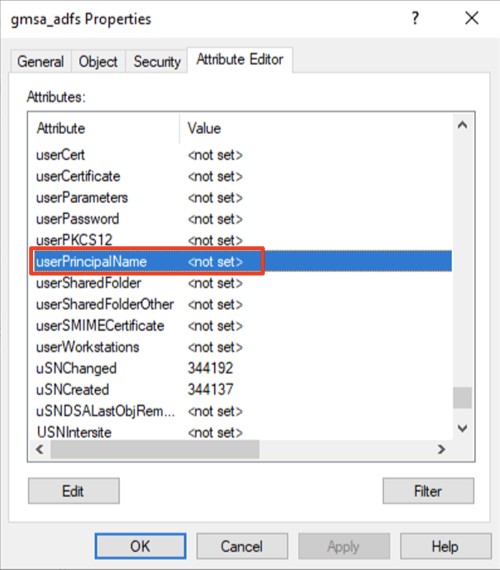
In the Properties dialog, select the Attribute Editor tab, scroll down and select userPrincipalName. Click Edit.

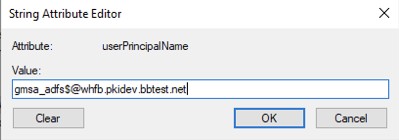
In the String Attribute Editor dialog, enter userPrincipalName of the Service Account. UPN will need to be in the format, <cn of the Service Account>$@<domain name>. For this example, the cn (or the shown name) of the Service Account is “gmsa_adfs”, and domain is “whfb.pkidev.bbtest.net”. Resulting UPN for this example will be “gmsa_adfs$@whfb.pkidev.bbest.net”

Click OK twice to apply the change and close the dialogs.