自動登録証明書プロファイルを作成する
APIトークンの構成と構成ユーティリティの準備ができたら、Autoenrollment Serverが使用する証明書プロファイルを作成する必要があります。証明書プロファイルを作成するには、管理者権限に少なくともプロファイルの表示とプロファイルの管理が含まれている必要があることにご注意ください。
注記
Your administrator account needs to include at least the Certificate profile manager user role to create certificate profiles.
Create a certificate profile
Sign into DigiCert ONE and navigate to DigiCert® Trust Lifecycle Manager.
Select Policies > Certificate profiles from the main menu.
Select Create profile from template.
Select the certificate template for the type of certificate you need.
注記
Note: The appropriate license for the seat type of the template selected must be purchased and available in your account, otherwise that template’s link will be disabled.
Under the General information section, enter the profile Nickname and choose the Business Unit and issuing CA.
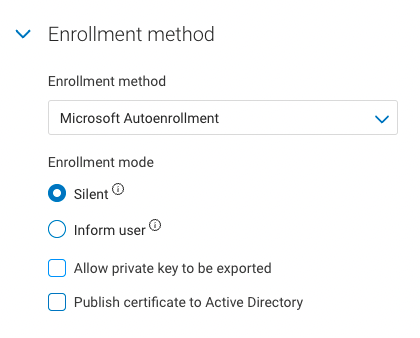
From the Enrollment method dropdown, select Microsoft Autoenrollment.
注記
Note: When Microsoft Autoenrollment is selected as the enrollment method, the Authentication method defaults to Active Directory.
Select the desired Enrollment mode radio button:
Silent — Certificate enrollment is fully automatic and is not visible to the user
Inform user — Windows prompts the user to initiate a certificate enrollment
Check Allow private key to be exported if users need to be able to export their certificates and private keys.
Check Publish certificate to Active Directory to allow certificates to be published to your Active Directory.
When selecting Yes, you will need to assign a special permission to the Autoenrollment Server to allow certificate publishing. Refer to “Allow Publishing to Active Directory” for more details.
Select Next.
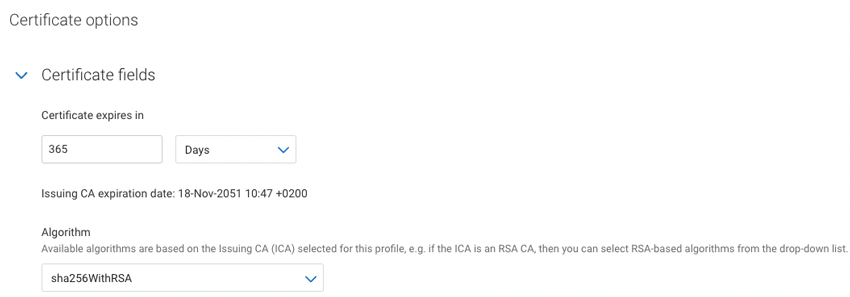
Under Certificate fields, select the validity period unit (Years, Months, or Days) and enter the value in the textbox.
注記
You cannot issue an end entity certificate with a validity period longer than the remaining validity of the issuing CA. The issuing CA expiration date is shown as a reference in this section.
Select the Algorithm from the available algorithms in the dropdown list. Available algorithms are based on the issuing CA selected for the profile.
Select the Key type and attribute from the dropdown lists.

Select the checkbox to Allow duplicate certificates if multiple certificates are to be issued for the same seat ID.
Under Renewal options, select the Renewal window from the dropdown list. The default (recommended) value is 30 days.
Select Subject DN and SAN fields from the dropdown list. Select as many fields as required for your certificates, then select Add fields.
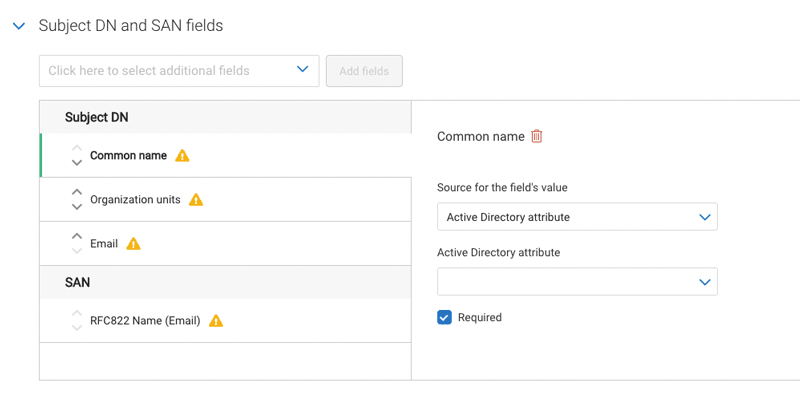
For each selected field, the Source for the field’s value dropdown list on the right defaults to Active Directory attribute, as this is the only currently supported source for autoenrollment certificate profiles.
注記
Note: that some Subject DN fields allow multiple values to be added. Select Add and specify the source and Active Directory attribute field for each additional entry. The example shown below shows the Organization units field.
ドロップダウンリストで、サブジェクト識別名とSANフィールドを選択します。証明書に必要な数のフィールドを選択し、フィールドを追加を選択します。
左側のナビゲーションメニューから、プロファイルの管理を選択し、次にプロファイルを選択します。
プロファイルの追加を選択します。
必要な証明書タイプに応じたテンプレートを選択します。
選択したテンプレートのシートタイプに適したライセンスを購入し、アカウントで利用できるようにする必要があることにご注意ください。
一般情報セクションで、プロファイルのニックネームを入力し、ビジネスユニットと発行承認局(CA)を選択します。
登録方法ドロップダウンから、Microsoft Autoenrollmentを選択します。
Microsoft Autoenrollmentを登録方法として選択した場合、認証方法のデフォルトはActive Directoryになることにご注意ください。
希望する登録モードのラジオボタンを選択します。
サイレント - 証明書の登録は完全に自動化され、ユーザーには表示されません。
ユーザーに通知 - Windowsは、証明書の登録を開始するようにユーザーに促します。
ユーザーが自分の証明書と秘密鍵をエクスポートできるようにする必要がある場合には、秘密鍵のエクスポートを許可にチェックを入れます。
証明書をActive Directoryに発行するにチェックを入れ、Active Directoryに証明書を発行できるようにします。
Yesを選択した場合、証明書の公開を許可するには、Autoenrollment Serverに特別な権限を割り当てる必要があります。詳しくは、「Active Directoryへの公開を許可する」を参照してください。
次へを選択します。

証明書フィールドで、有効期間の単位(年、月、日)を選択して、テキストボックスに値を入力します。
注記
発行認証局の残存有効期間より長い有効期間を持つエンドエンティティ証明書を発行することはできません。このセクションでは、参考として発行認証局の有効期限を表示しています。
ドロップダウンリストの利用可能なアルゴリズムから、アルゴリズムを選択します。利用可能なアルゴリズムは、プロファイルに選択された発行認証機関に基づいています。

鍵タイプと属性をドロップダウンリストより選択します。

同じシートIDに対して複数の証明書を発行する場合は、複数の証明書を許可するのチェックボックスを選択します。
更新オプションで、ドロップダウンリストから更新ウィンドウを選択します。デフォルト(推奨)値は30日です。
ドロップダウンリストで、サブジェクト識別名とSANフィールドを選択します。証明書に必要な数のフィールドを選択し、フィールドを追加を選択します。

選択された各フィールドについて、右側のフィールドの値のソースドロップダウンリストは、Active Directory属性がデフォルトとなっています。固定値フィールドのサポートは、将来のリリースで追加が予定されています。
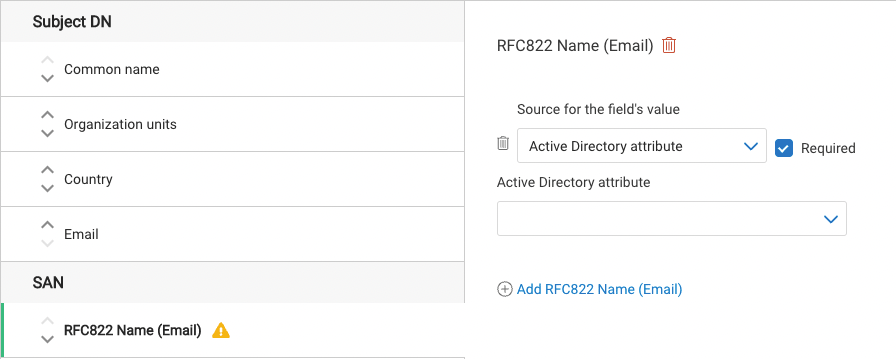
サブジェクト識別名フィールドの中には、複数の値を追加できるものがあることにご注意ください。追加を選択し、追加の各エントリのソースとActive Directory属性フィールドを指定します。下図の例では、組織部門フィールドを表示しています。
必須チェックボックスを使用して、どの証明書フィールドが必須であるかを指定します。
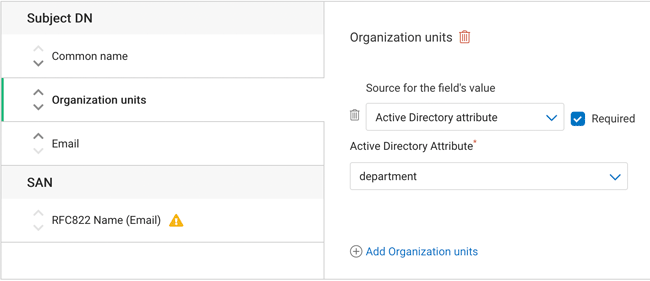
SANフィールドは、それぞれ複数の値を追加することができます。追加リンクを選択し、各追加フィールドのソースと値を指定します。これは、以下のRFC822の名前(Eメール)に向けて示されていますが、その他の名前(UPN)およびその他の名前(カスタム)フィールドにも適用されます。
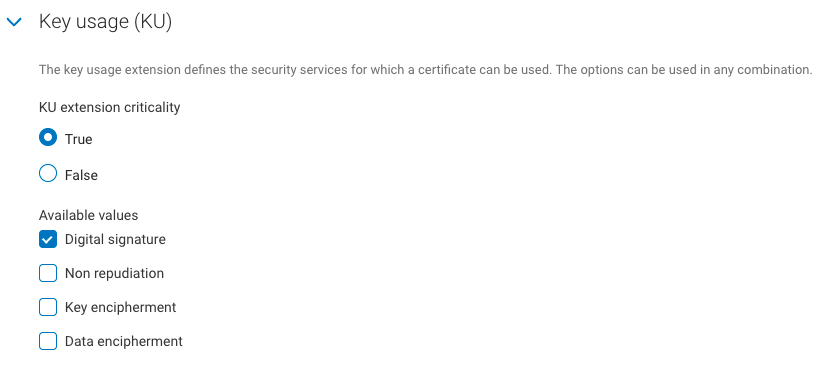
鍵使用方法 (KU) 拡張子の緊急度と値を指定します。表示されるKUオプションは、使用する証明書テンプレートによって異なることにご注意ください。
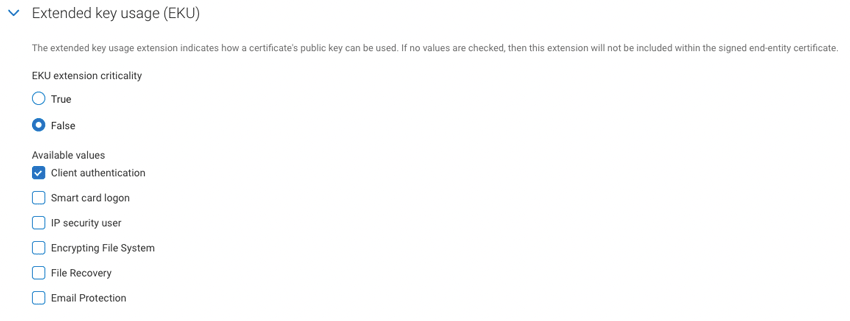
拡張された 鍵使用方法 (EKU) 拡張子の緊急度と値を指定します。表示されるEKUオプションは、使用する証明書テンプレートによって異なることにご注意ください。
証明書配信形式で、使用する証明書形式と、証明書発行時に含めるチェーン証明書を選択します。
Eメール設定と通知で、証明書失効通知メールに使用するテンプレートを指定します。
管理連絡先で、証明書通知メールにデフォルトまたはカスタムの管理者連絡先の詳細を含めるかどうかを指定します。エンドユーザーの内部サポートの連絡先を含めるのはオプションですが、推奨されていることにご注意ください。
シートIDマッピングで、シートIDとして使用する証明書フィールドを選択します。これは、ライセンス発行のために各登録組織を一意に識別します。
サービスユーザーバインディングで、証明書プロファイルにバインドするサービスユーザーAPIトークンを選択します。ドロップダウンからどのサービスユーザーも選択しない場合、アカウント内のすべてのAPIトークンがこのプロファイルを管理できるようになります。
作成を選択します。新しく作成された証明書プロファイルが、証明書プロファイルのリストに表示されます。